Tuesday, 20 August 2013

Goal Update: 26 X 26

I've been updating my original 26 X 26 post with links whenever I complete a recipe, but for those who haven't been checking back I decided to do a quick update.

So far, I have completed 3 out of 26 (well, 27) recipes on my list. I hope to work through at least three more over the next week. I've been very pleased with the recipes so far, and am enjoying stepping out of my comfort zone a little bit. I hope that I'm encouraging you to do the same!
  1. pie crust
  2. lemon meringue pie
  3. puff pastry
  4. beef wellington
  5. souffle
  6. hollandaise
  7. jam and/or jelly
  8. dill pickles
  9. chicken kiev
  10. croissants
  11. macarons
  12. baked Alaska
  13. sausage patties
  14. New York cheesecake
  15. tortillas
  16. french bread
  17. ricotta cheese
  18. donuts (completed: August 16th)
  19. marshmallows (completed: August 14th)
  20. pudding
  21. crock pot roast chicken
  22. yogurt
  23. sugar cookies with royal icing
  24. the perfect vanilla cupcake
  25. mozzarella
  26. pretzels (completed: August 7th)

Monday, 19 August 2013

Weekly Goal Update: Running (August 12th to 18th)

I ran only two days this week - Monday and Tuesday. I attempted a run with A on Friday morning, but didn't get far after a big breakfast!

Mondays run felt really good, right from the start. I had it in my head that I didn't want to stop running until I hit 2 km and I managed to run for 2.34 km before stopping. I walked up the large hill near the end of my route, but run the rest of the way home. I was very happy with this run.


Tuesdays run was amazing! I managed to run for 2.62 km without stopping, my farthest yet, and also went my farthest distance. I was super proud of myself after that run, and if we hadn't gone camping, I'm confident I would have been over 4 km for the week. 


I'm not too confident that I'll hit 5 km of road running by September 1st (which is only 13 days away), but I'll do my absolute best!!


MIA

Sorry for the lack of posts over the last couple of days. I was off enjoying a lovely weekend camping with A and his family, plus my mom. We went to a new-to-us campground and all really enjoyed it. The gorgeous weather didn't hurt things either! I'm now in Medicine Hat visiting A for a couple days and then back home to do some laundry and get a few more 26x26 items crossed off the list.

I'll be back later with my running update for the last week (hint: I had one great run... but didn't do much else!), but for now here are the only (!!) two pictures I took over the weekend.

My baby girl, Keri, hanging out with me before everyone else was awake.

Coffee and Baileys. The homemade stuff was a hit!


Friday, 16 August 2013

Banana Chocolate Chip Baked Donuts

Whether you eat donuts or doughnuts, you are going to want to make these! The texture reminded me a lot of muffins, but the flavour from the greek yogurt made them really special. 

I spent a full day in Calgary looking for a donut pan, but it's certainly not necessary for the recipe. The batter I had remaining was put into mini muffin tins and baked into muffins - perfection! You could also use a whoopie pie or muffin top pan with similar results. Just adjust the baking time!

(I made these late last night, so didn't have great light for the ingredient picture. Therefore, there isn't one!)


Keeping it real: I filled the donut pan to full, so my donuts don't actually have holes!

For the donuts:
1 cup mashed banana (I needed three)
1/2 cup granulated sugar
1/2 cup greek yogurt
1/4 cup butter, melted (I used salted)
2 eggs
1 tsp. vanilla extract
2 cups all-purpose flour
1 tsp. baking powder
1/2 tsp. baking soda
1/4 tsp. salt
1 cup chocolate chips (I used milk chocolate)

Preheat the oven to 325 degrees F.

Using your electric mixer with the whisk attachment, mix together banana, sugar, and yogurt until combined.

Add melted butter, eggs, and extract. Mix until combined.

Add dry ingredients to the batter and mix until just under incorporated (to prevent over mixing when adding the chocolate). Fold in chocolate chips.

Grease your donut pan and fill each donut mold 3/4 full of batter (I overfilled mine, resulting in the lack of holes).

Bake for 12-15 minutes. Remove from the oven and allow to cool before eating.

Adapted from: Janie's Kitchen

26 x 26 : 3 / 26


Thursday, 15 August 2013

Homemade Baileys

On Tuesday, I posted this picture in my "day in the life" post. Did anyone guess what I had made with those ingredients?


HOMEMADE BAILEYS!!

I've made homemade Baileys in the past, and thought it would both a great blog post and a great addition to our camping trip. It is extremely simple to whip together and the results are fantastic; basically chocolate milk with some whisky thrown in!


For the Baileys:
5-ounces high-quality milk chocolate, chopped (I used Hershey's, because in my small town that is high-quality!)
1 1/2 cups Irish whiskey (I used Canadian, because it was all I had.)
1 can sweetened condensed milk
1 can evaporated milk
1 tsp. vanilla extract
1 1/4 cups heavy cream (I used coffee cream, because my grocery store didn't have heavy cream in stock. I know...)
1/4 tsp. instant coffee

Melt chocolate in the microwave, stirring until totally smooth. Add to a large bowl and whisk in a couple tablespoons of whiskey, stirring until combined (it may separate, but that's okay). Whisk in the condensed and evaporated milks until combined and smooth, then whisk in the remaining whiskey, cream, extract, and instant coffee (the coffee and chocolate may not dissolve at first, but will as they sit).

Pour mixture into a large bottle and refrigerate until cold. Shake or stir every so often to help the instant coffee and chocolate dissolve. It is so much better after it sits for at least one day.

Source: How Sweet Eats


Wednesday, 14 August 2013

Vanilla Bean Marshmallows

Marshmallows always seemed so daunting (and messy!) to me. Sugar syrup, gelatin, blooming? Ain't no body got time for that.

But in reality, it takes almost no time at all and the results are divine (this coming from a girl who doesn't even really like marshmallows). They will be perfect in s'mores while camping this weekend!
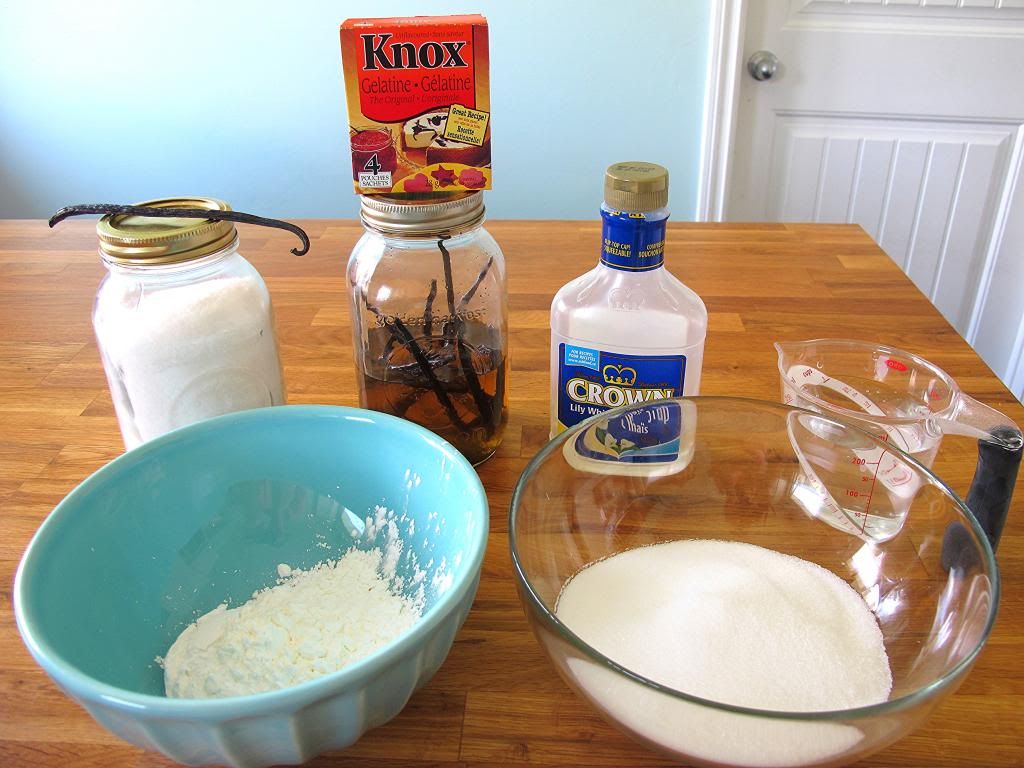
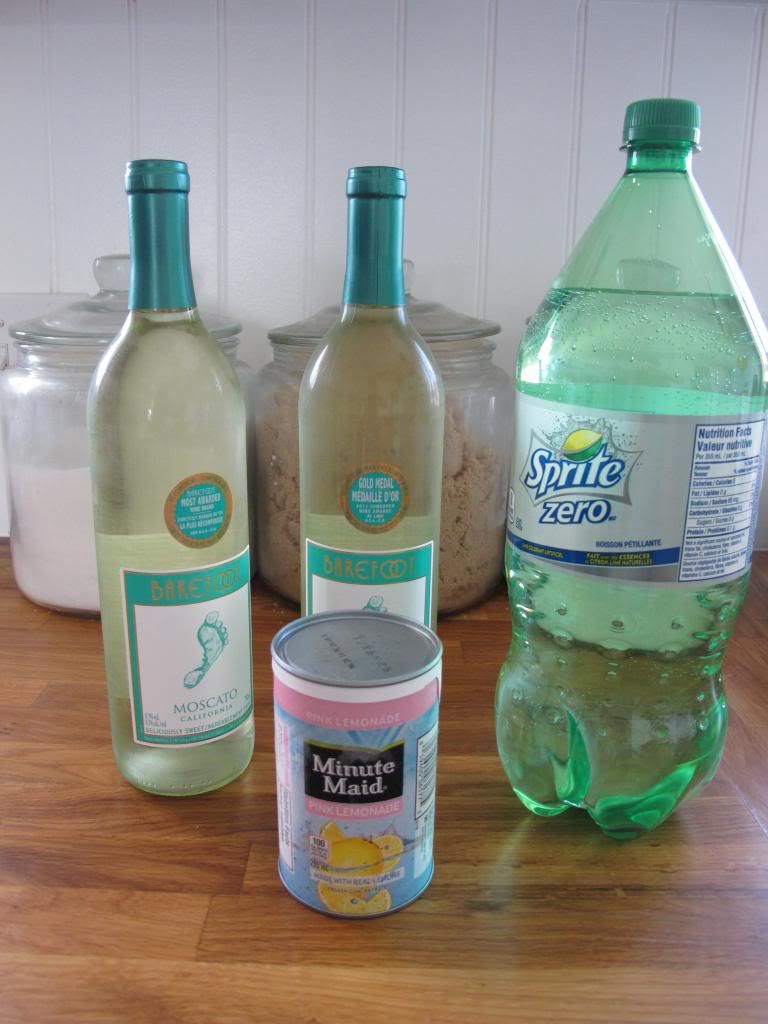
Ingredients
Marshmallows: salt, vanilla bean, vanilla extract, gelatin, light corn syrup, water, granulated sugar 
Coating: icing sugar, cornstarch
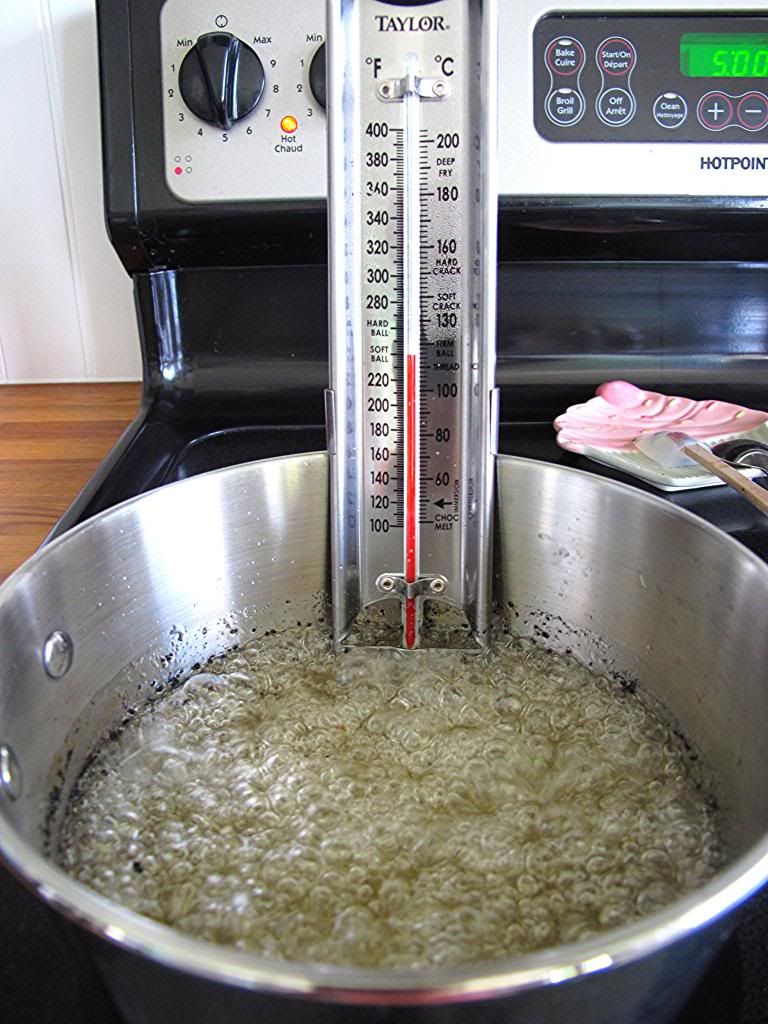
Sugar syrup.

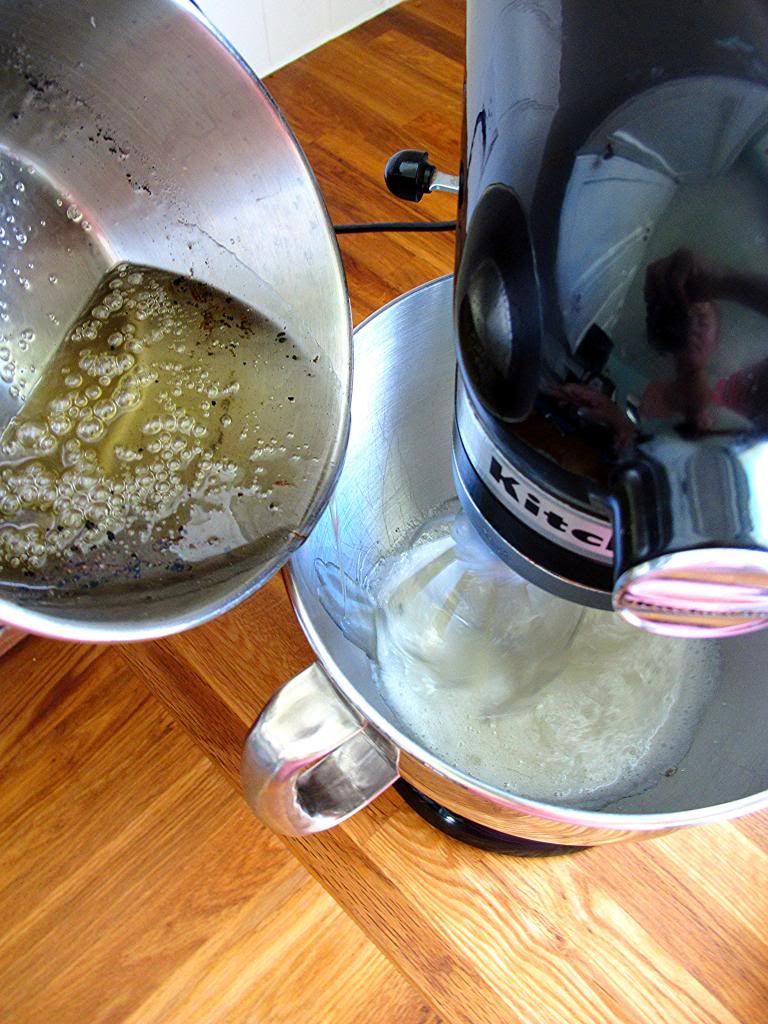
Pouring the syrup into the bloomed gelatin.

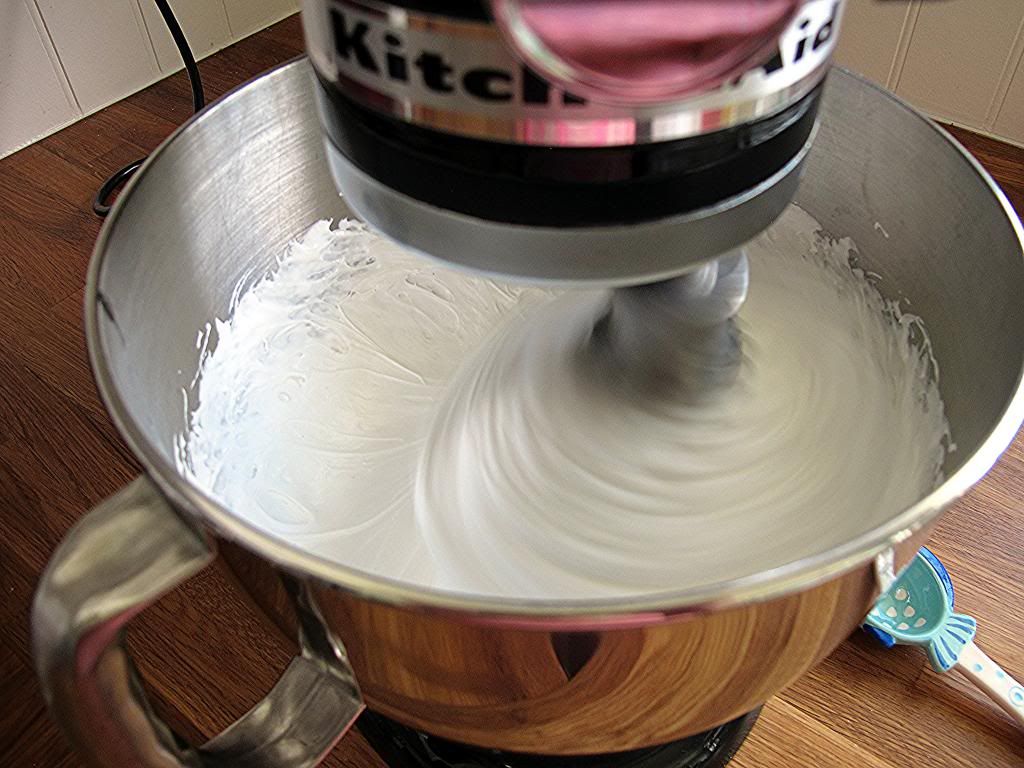
After whipping for ten minutes.

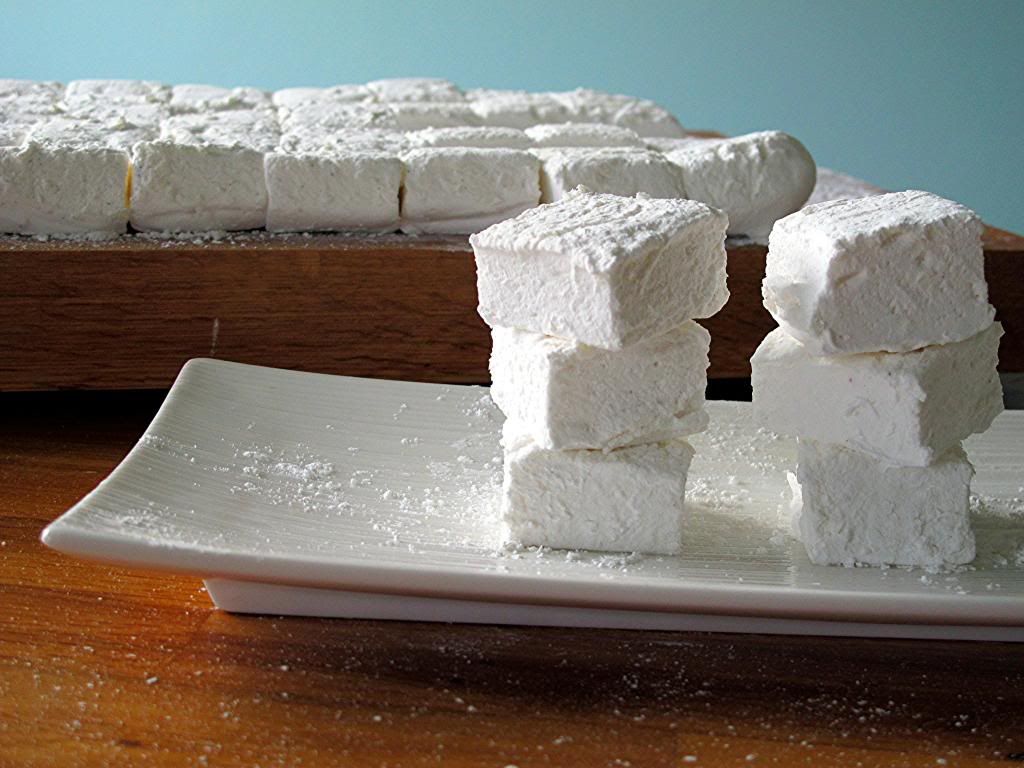
All cut and ready to go.

For the marshmallows:
1 cup cold water, divided
3 packets gelatin
1 1/2 cups granulated sugar
1 cup light corn syrup
1 vanilla bean, split lengthwise (optional)
1/4 tsp. kosher salt
2 tsp. vanilla extract
1/4 cup confectioners' sugar
1/4 cup cornstarch

Place 1/2 cup of the water in the bowl of a stand mixer. Sprinkle the gelatin over the surface to soften. Meanwhile, in a small saucepan with a candy thermometer attached combine the remaining 1/2 cup water, sugar, corn syrup, seeds scraped from the vanilla bean, and salt. Cook over medium heat until the mixture reaches 240 degrees F. When this temperature is reached, immediately remove the saucepan from the heat.

With the whisk attachment on the mixer moving at low speed, slowly add the syrup to the bowl with the gelatin in a drizzle along the side of the bowl. Once all the syrup has been added, increase mixer speed to high and whip for 12-15 minutes, or until the mixer is thick and lukewarm. Blend in the vanilla extract during the final minute.

Combine the confectioners' sugar and cornstarch in a bowl and whisk to blend. Lightly grease a 9 x 13-inch pan. Coat the bottom and sides of the pan with the sugar/cornstarch mixture, reserving the rest. Once the marshmallow mixture is finished whipping, use a lightly greased spatula to spread it into an even layer in the prepared pan. Sprinkle a layer of the sugar mixture over the top to coat lightly. Let stand uncovered for four hours or up to overnight.

Remove the marshmallow slab to a cutting board. Cut into desired shape with a pizza cutter or cookie cutter (dipped into sugar mixture to prevent sticking). Add the marshmallows to a zip-top bag with the remaining sugar mixture (adding more confectioners' sugar if necessary) and shake to coat.


26x26 : 2 / 26


Tuesday, 13 August 2013

Sarasota Lemonade

In the summer, there is nothing that I like better then a glass of Barefoot Moscato with frozen berries to help keep it cool. It is just so refreshing and delicious.

Well, there was nothing better until I tried this recipe!

It is so simple, but so incredibly tasty. I made up a large batch to take camping with me this weekend, but I'm starting to wonder if there will even be any left by Thursday!

Ingredients
Two bottles of your favourite Moscato (I used Barefoot), Sprite, pink lemonade concentrate
Not pictured: frozen strawberries and raspberries


For the lemonade:
2 bottles of Moscato (I used Barefoot)
1 bottle of Sprite
1 can of pink lemonade concentrate, thawed
Frozen berries (I used strawberries and raspberries)

Combine the wine and concentrate in a large pitcher or bottle (I used an empty Simply Lemonade bottle, for easy transportation). If you are serving the lemonade immediately, also combine the Sprite.

Add a couple handfuls of frozen berries and give the mixture a stir or shake.

To serve, put a small handful of frozen berries at the bottom of the glass and top with the lemonade.

If you want to make this in advance, do not add the Sprite as it will go flat. To serve, just pour lemonade into a glass with frozen berries and top with Sprite. 

I dare you not to get addicted!


Note: It is so much better the second day, after it's had time to sit. Yum!